INHALTSVERZEICHNIS
Introduction
The individual dashboard conguration offers the possibility to congurate an individual dashboard in your own Starhunter instance. Each user decides for themselves what should appear at first glance on the start page.
Step by step instructions
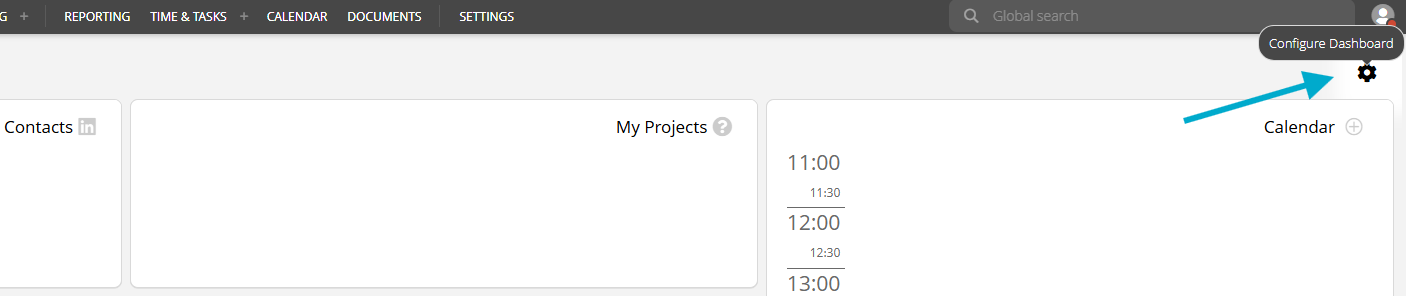
1. Click on the settings icon at the top right of the dashboard to activate the option to customize the settings
2. Check the box 'Activate individual dashboard?', the individual dashboard is now activated

Note: If the individual dashboard is not active, the Starhunter standard conguration is shown
3. Click on 'Tile type' to select the desired content. This is where the entire conguration of the individual start page view takes place.

4. The following content is available for the tiles in the dashboard:
a. Active colleagues
b. Upcoming tasks
c. Favorite projects
d. Favorites
e. Birthdays
f. Calendar (month)
g. Calendar (week)
h. Kanban (project candidates)
i. Contacts
j. My candidates
k. My projects
l. Support
m. Appointments (daily view)
n. Welcome
o. Xing/LinkedIn imports
p. Time recording
5. Start customizing the dashboard by selecting the first tile, e.g. 'Appointments as day view'.
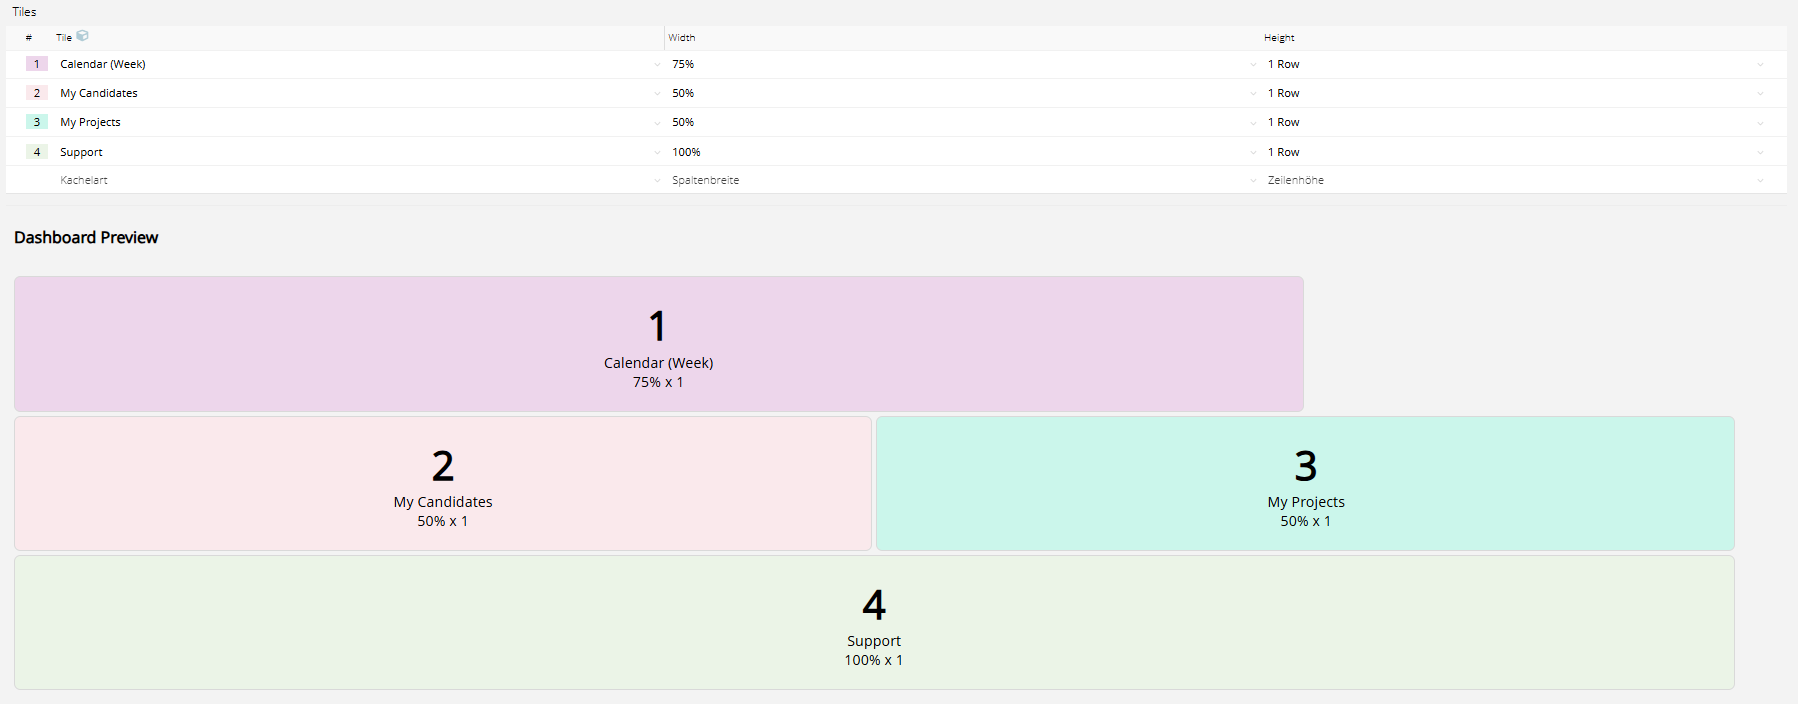
6. After selecting the tile type, the tile width is automatically set to 50% and the height to 1 row and the first block appears for viewing in the dashboard preview below the table
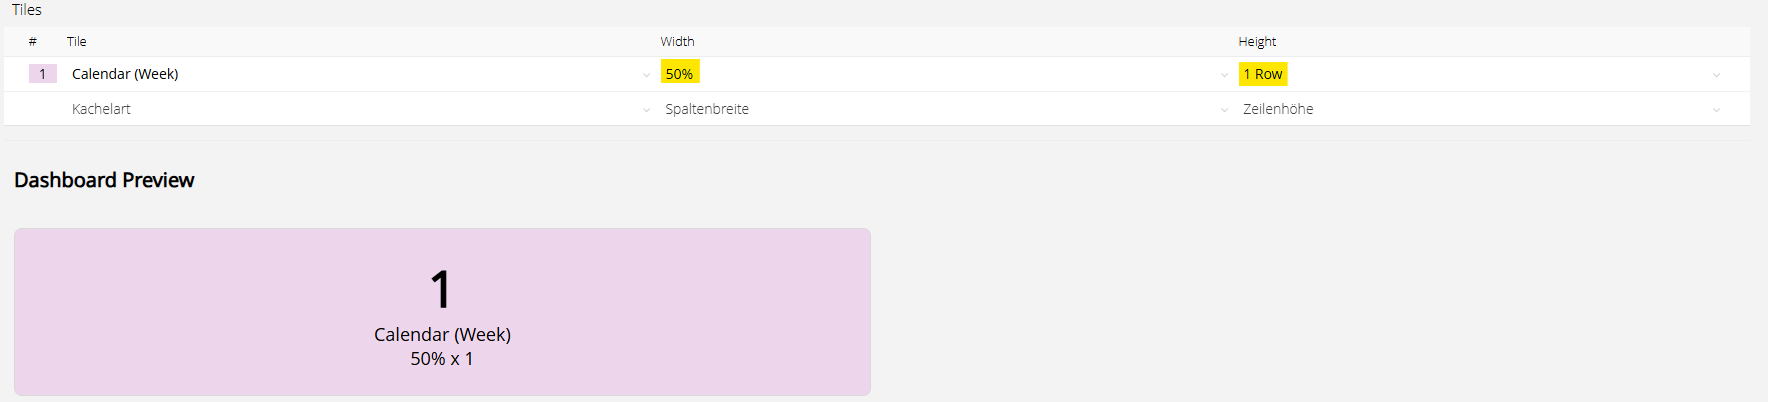
Note: The dashboard preview always shows the current display of the individual tiles based on the adjustments made.
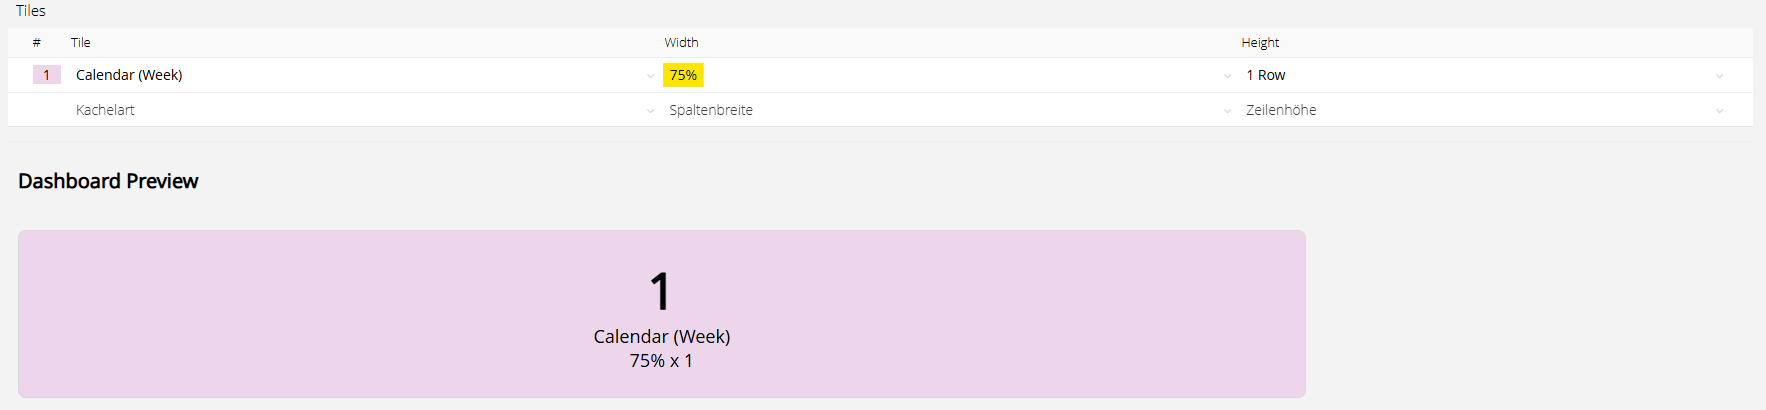
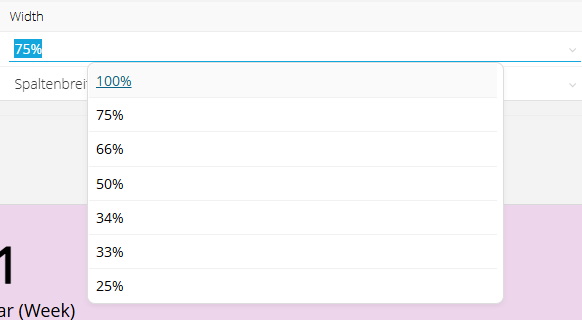
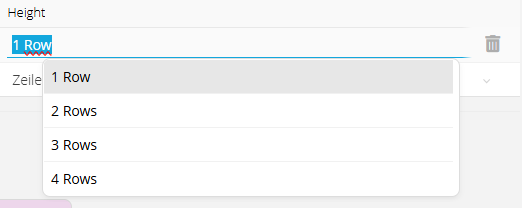
7. Adjustment of the default width and height possible by clicking in the respective field and selecting the new width/height accordingly
8. Selection of additional tiles, as well as adjustments of the respective width and height possible, in order to be able to design the dashboard individually according to wishes and daily use
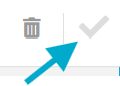
9. Adjustment or movement of the tile arrangement via drag and drop of the individual tiles possible a. Click on the corresponding row b. By holding down the mouse button, the row can be moved to the desired position

10. After successful customization, click on 'Save' to apply the changed settings to the dashboard
Note: The changes can be adjusted at any time or reset to the standard view by deactivating the individual conguration.
Was this article helpful?
That’s Great!
Thank you for your feedback
Sorry! We couldn't be helpful
Thank you for your feedback
Feedback sent
We appreciate your effort and will try to fix the article